This is our day 1, from checking in to boarding was smooth sailing and then immediately exploring around the cruise ship.
Our second day, the celebration night or gala night. Formal attire and fine dining. Loads of activities around the ship that night from shows at headliners theatre to family disco and party at the Club House and the fine dinings, etc.
Our third day, first stop at Stavanger. What an experience. I can't detail everything but it's our first time to book a taxi abroad and explore the place on our own.
Fourth day, second stop. Olden is so beautiful. The scenery from the moment the ship entered the place and around the port. It's lovely. Really breathtaking.
Fifth day, Hellesylt. This is a small place but you are going to love it because it's so peaceful and the waterfalls is literally just in front of you.
Sixth day, we were meant to stop at Haugesund but due to bad weather, it was cancelled. The captain of the ship tried to find a nearby area that we can dock and explore but it was all the same, so we had to sail back. The crew made an extra effort to entertain us and made the most of it whilst on board for the day. So there's basketball tournament for crew vs passenger, table tennis tournament, kids can go to The Reef and have fun with out kids. There are two age brackets, the 5-8 and 9-12 years old, karaoke open mic, vocal coaching, juggling lessons, etc.
The 7th day, is all about food. We've explored as much restaurant and foods as we can. Obviously, had to pack our staff and we even did sa laundry on board. And that concluded our first cruise ship experience.
Ordered this online via Emma Sleep UK and delivered safely. They will message you on how to prepare especially for safety due to pandemic. Like, make sure the house is well ventilated. Open windows when you can. Then you will receive text message on the estimate time of arrival so that the people in the house are prepared. Clear the area where you want the boxes to be placed. Upon arrival, they will ask you at the door where to put the boxes, you can tell them exactly if you want it in your bedroom or somewhere in the house because some of the boxes are very heavy especially the mattress and the bedframe. Then you need to stay in one place while they are putting the boxes on the designated area. Then they will take photos of the boxes and confirm by asking your surname. Instead of you signing for the parcel.
In my case, what I did was -- I asked them to just put the boxes by the hallway. Then I just opened them in our lounge and bring the stuff I needed in our bedroom because there's not enough space in the room if the boxes were put in there. I can move freely by just bringing the materials that I needed at the time. The only challenge was the mattress because it was heavy. Two to three person is needed if you are small built like myself. hehehe.
The assembly is straightforward. You can refer to my video or look online or on their website, they got a video on how to assemble it. But by just reading the manual that came with it, you'll be able to assemble this unit easily.
I recently bought this Rotosound Roto Pinks Gauge 9 set of strings for the Spear SG copy electric guitar that I was restoring. This is 3 sets of strings and comes with a free strap. Apart from buying it cheap and it comes with a free strap, I like that the string set is packed in a foil plus inside the foil is a moisture absorber silica gel pack or bag. The string quality is also very nice. There are three colours which are red, white and blue same as the colour of the Union Jack British flag. Rotosound is made in England, UK.
For now, I am very satisfied and happy with this recent purchase. They claim that this strings are long life. I might not be able to tell you yet because I just recently put it and use it but I will keep observing the quality of the strings and will update you soon.
Kindly watch the video because you might find it also more useful especially on how I change my strings. Again thanks for visiting my blog and will keep you posted. Cheers!
My first ever purchase from Thomann, the Harley Benton HBO-850 Classic Blue roundback electro-classical guitar. The experience was positive and most of all Im really pleased with the guitar. It is very inexpensive and it came within the time span that they mentioned which is 3-4 working days. I bought this on the 5th and it arrived on the 10th it was because of the weekend. So if we remove the Saturday and Sunday, the parcel came within just 3 days. It was via UPS. The tracking system was straight-forward.
Bought this item because I received an Amazon gift card from TutorCare, a training centre in Gatwick. Had my train the trainer there and enjoyed it. So I promised them I will put it to good use and decided to buy this one.
At first, I was doubtful in buying this Gigbag because of the reviews on Amazon, I even asked online if it will fit my Fender DG60CE electroacoustic guitar and the reply I got was a stray copy fits this gigbag. And another thing, I had hard time looking for the measurements of this gigbag. So here it is now. It answered all my questions. It fits my acoustic guitar.
Gigbag measurement: Length 42.5, upper body 14, lower body 16 inches.
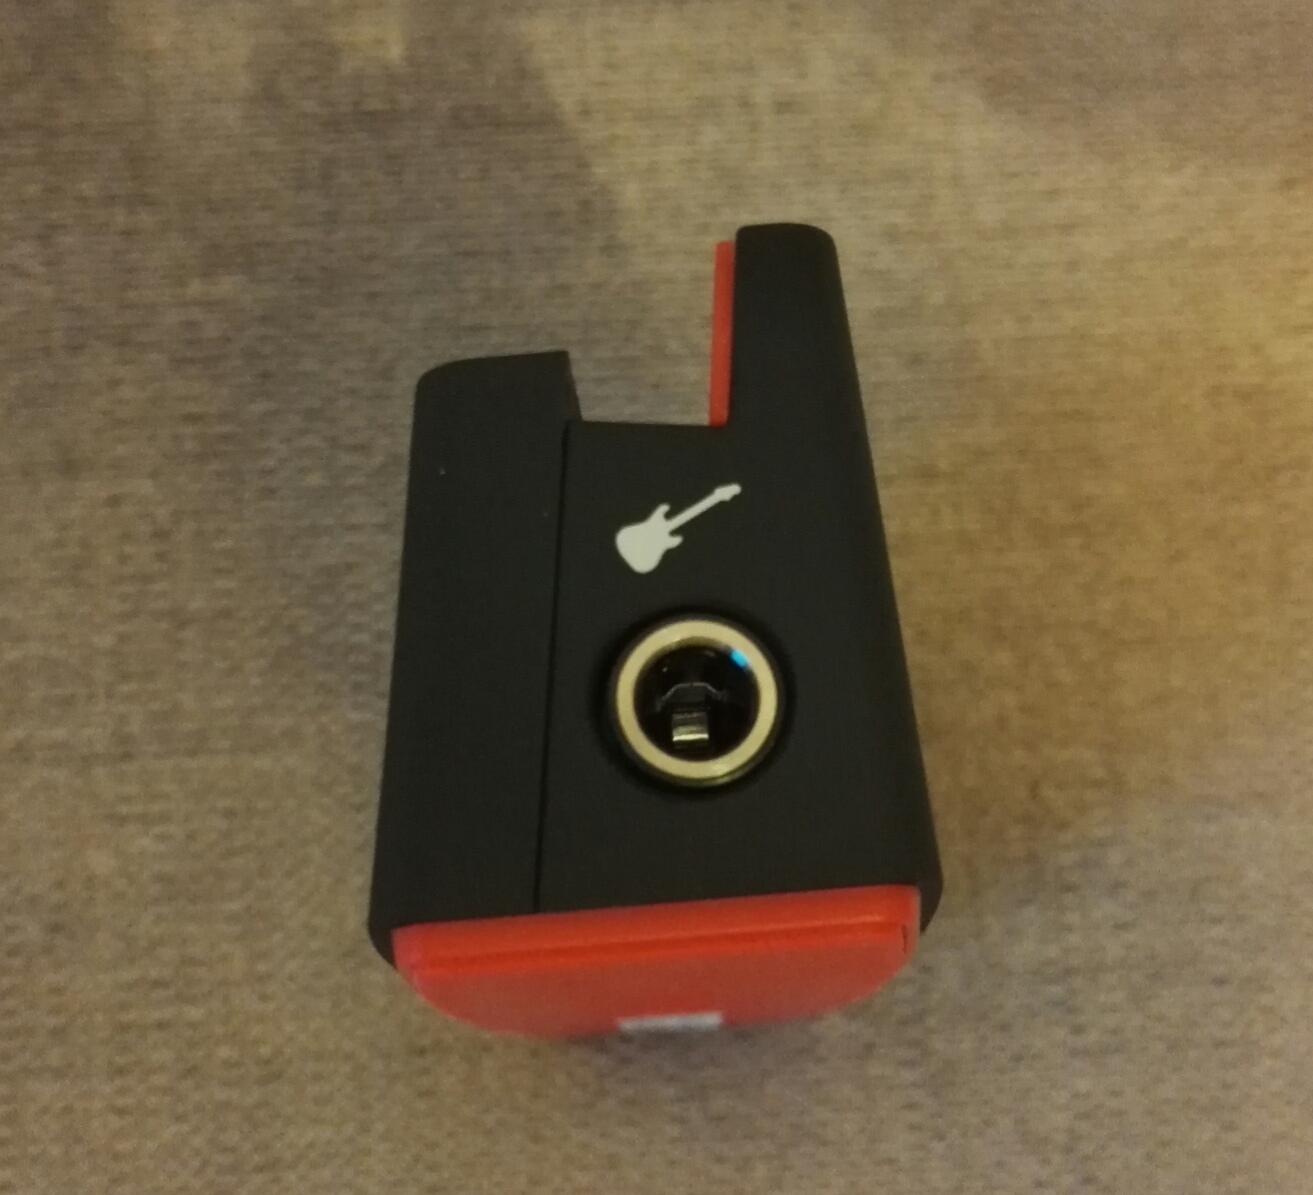
iTrack Pocket is designed for YouTuber either your a presenter, a musician, a singer or someone who needed a decent audio quality for video recording that's done simultaneously. Like when I do most of my video recording, the audio is recorded separately. For example Im using Quicktime player for the video and Garageband for the audio, then put or mix it together using iMovie. The challenge is to make sure that the audio goes with the video and there's no noticeable delay. So the perfect solution for this is the iTrack Pocket. It so so portable that you can record anywhere, anytime.
Here are the list of questions to ask if you want iTrack Pocket:
1. Are you a singer who wants to record yourself or your ideas instantly and with decent audio/video quality?
2. Are you a musician who wants to record your instrument, your performance, your ideas?
3. Are you an iPhone user or planning to buy one? Because this gadget uses IOS platform. You will be needing either iPhones or iPad.
4. Do you want an easy setup, portable, and can be used almost anywhere?
5. Are you a vlogger, YouTuber, presenter?
6. Do you want a recording studio that fits in your pocket as well as your budget?
If you have two or more yeses to these questions, then iTrack Pocket is for you.
This mini gadget is an all-in-one solution that will do all the trick and save you time and money. No need to buy expensive condenser microphone, mic stand, camera, tripod for your camera, audio interface, recording software and loads of time and effort in editing. iTrack Pocket is literally a studio in your pocket.
Where to buy? Loads to choose from online. I bought mine from Gear4Music and it was Black Friday that time so I got a good deal. It was only £14.99 plus £3.49 delivery.
What's included in the box? Just the iTrack Pocket itself, the lightning cable and the manual. The box itself contains the instruction on how to install, register, etc. So don't lose the box, you need it for the bundle code and serial number.
Is it easy to install or use? Well for me it was a bit tricky, because Im not an iPhone user. Im lucky because not only my other half bought me an iPhone for xmas, she's been using iPhone ever since so I got a private tutor on how to use iPhone. iTrack is sort of plug n play. It doesn't come with a CD or installer. All you have to do is download Impact by Focusrite from App Store and plug your iTrack using the lightning cable then connect it to your phone and open the app after you downloaded and install it. Don't forget to register your iTrack. Instructions are found on the box as well as your registration code, etc. You are all set. Just hit record.
What iPhone is it compatible? iPhone 5, 5S, 5C. Apple devices using iOS 6 or 7.
How to record instrument? You can either record using the built-in stereo mics or plug your instrument (guitar, bass, keyboards) using the 1/4" input. Then adjust the volume knob on the side. Make sure it doesn't clip. Then, you're ready to record.
How to add effects? You have the option to add effects either before recording or after you record your video. Just simply click/press the FX icon and swipe to choose what amp/effects to use.
How to edit/cut video? There's a strange looking icon on the bottom next to the FX icon, click that and then a film strip will appear on top of the screen. You can drag either ends to edit the length of your video.
How to delete or discard recording? I really struggled at first to remove or delete the test recordings that I did. It was because, I couldn't find the delete button. Being new to iPhone didn't help as well. Or perhaps, it was my eyesight. But eventually I found the icon. First, you need to go to file/recording library or folder. Then on the top right corner, you can see a word SELECT, press that one and then select a video or videos you want to remove. After you select or click the video/videos you want to delete, the margin or borders will become highlighted. Then at the right bottom corner or your phone, you will see the bin icon. Press it to delete.
How to upload recording? The upload icon is located on top, click it and select where you want to save or upload the video.
This is a 4-in-1 men's grooming kit (beard, stubble trimmer, hair clipper). Waterproof, can be washed directly under the tap but make sure that the charger wires are not hooked. Skin-friendly, high-performance blades for a gentle trim. Really soft and smooth to the skin. Up to 60 minutes use on a 10-hour charging. Really good wireless shaver.
We love singing, and our family bonding would always be KARAOKE. Such a shame our next door neighbour is not a big fan of it and will bang our walls each time. We can't do it even if it's only 3 in the afternoon or even on Christmas eve. Party will never be complete for Filipinos when there's no Karaoke or Videoke. Good thing I found this Q7 Wireless Handheld KTV karaoke bluetooth microphone when we went home in the Philippines. Saw it in the mall. Actually, one of our friend already mentioned it to us that there's this bluetooth microphone that they are using and their neighbour now is not complaining because of this bluetooth mic. So, I looked online and bought one for my wifey through eBay. It's quite cheap but it did arrive and delivered on time and complete.
Unboxing: It came with a softcase. It was not as secured as I would expect. But I guess you get what you pay for. The unit is fine and it came with two leads. One USB lead for charging and the other one is the earphone lead for your phone so you can connect the microphone and sing and record using your Android or iPhone. You can operate this microphone even without reading the manual. But it's good to browse the manual so you got a better idea of what you can do about this microphone.
It is rechargeable, so when it came I had to recharge it first before I can use it. Also at the bottom of the microphone there's a USB input. I used my USB flash drive which has almost 1000 mp3 songs and it converted the microphone into a Hi-Fi speaker system. It is much louder than using the microphone speaker as your karaoke monitor. The USB option for flashdrive is amazing. I love it. The sound quality is a lot better than when you are singing through this mic.
The only downside that I can think of is that.... they could have put an earphones out. So you can connect your headset to it as your monitor. That way your speaker system can be private at times and also when you're singing, you can connect it to a portable recording device because it has an earphone line out.
I was looking for a headset that is cordless but not bluetooth connectivity because I will be using it for my guitar effects pedal or when Im doing home recording using my Native Instrument Guitar Rig Session IO. That's when I found this Hi-Fi S-XBS MH2001 5-IN-1 Wireless Headphones on eBay and it's quite cheap. So, I said to myself, I will have a go and buy one. Anyways, it's cheap what can go wrong.
Parcel Arrived: Well packed and it's not bad. I mean cheap but decent. I then tried it, followed the instructions on the manual which is quite easy and straightforward. They call it RECEIVER and EMITTER. Before, we use to call it Receiver and Transmitter isn't it?
The box contains the Receiver and the Emitter, one mono 3.5mm short earphone lead and manual. The Emitter already got the necessary lead connected to it. Also there's option to use 4.5v adaptor or batteries which doesn't come with the unit when you purchase. Good thing I always got batteries. The Receiver needed two AAA as well as the Emitter also needed two AAA batteries.
It is quite easy to use. Just follow the polarity of the batteries when you install it to the Receiver and Emitter. Only problem was when I was opening the battery compartment of the headphones, it's a bit hard because firstly, locating it. Although it was illustrated on the manual but sometimes we are not sure or what we don't care to read what's on the manual.
The battery compartment is located on the Left side opposite to where the volume and on/off control, reset and scan buttons. Slide to open the battery compartment. Once batteries are installed, turn volume control up to turn the unit on. Press reset and then press scan to use the FM function of the the headset. I enjoyed the FM functionality of this headset.
By the way, the headset is lightweight and comfortable. Fully adjustable, it even fit my 7-year-old boy. The materials are cheap but acceptable, I can't complain because the price is quite cheap. Sound is decent, got low bass sound as well as high trebles. However, when I tested the wireless functionality, it was not as loud as the FM volume. And, to pair your headphones to the Emitter, you have to press RESET first and then SCAN. Otherwise, it will still function as FM headphones.
I haven't tried the WIRELESS NET AUDIO CHAT and WIRELESS MONITORING because these weren't the reason why I bought this unit. I've tried the Wired headphones and I liked it. It's much louder and clearer compared to being wireless. I didn't like the lead that came with it because apart from it's short, the quality is cheap. So, I decided to order on eBay a longer and much better quality lead.
So far, I am quite please with this unit and will be using this most of the time; around the house whilst washing the dishes, ironing clothes, before going to sleep and of course jamming with my guitar and doing some home recordings. This time there will be no annoying cord/lead hanging in the way when I play my guitar.
It started as a callus on the ball of my left foot. I thought at first it was due to my very old shoes and the sole of the shoes that's wearing thin. It felt like I was stepping on a nail or something sharp that's poking my foot. It was like that for a while and then later on, it's getting worse in terms of discomfort. So I had to investigate and check what's happening in my foot. It looks like it was forming into a corn. I didn't know about this stuff, I just looked on Google and searched for symptoms that I was feeling at the time. I didn't take photos of my foot, but the ones on the net looked similar on what's happening on my foot.
Remedy: I didn't seek any medical advice. Just looked online and also went to pharmacy and looked around. I bought corn removal plasters. Used it for about a week and it relieved some of the discomfort and I thought it was helping. Then I started using file and just keep removing the callus around. Unfortunately, after a while, it came back again and the discomfort was getting worse.
To cut the story short, I didn't seek medical advice and just keep researching online and doing a lot of home remedies. Any thing that I can put into it, I would use. Even pain relief gel. Worse thing that happened apart from it was not healing and I keep doing something to it like I opened it using nail clipper because I thought there's just a splinter inside or trapped blood or something. So, that made it worse. And the pain was getting intense.
Another remedy: Corn removal (all-in-one pen). This one again, set my hopes high. I thought it was helping and I thought it will heal my corn. But, it didnt. It only scratched the surface. Again back to the usual habit of nail clipper and rubbing it off using file.
Then we went on holiday and the pain this time was unbearable. I think I got a very strong pain tolerance or I just don't want people especially my family to know how I suffer. But, they can notice that Im already limping. Then we went swimming in the beach. I thought that the salt water will help. But, what happened was, I stepped on a sharp rock or something that it bled. That's it, made it really worst. It was then that I looked closely and researched more online about it. And that's when I came across the word Verruca or Plantar wart. The pain Im experiencing, the look now on my foot. The white round thing and the tiny black dots. I can now confirm it was Verruca.
Treatment: After my own diagnosis, I now researched for treatment. There are a lot of treatments online and home remedies from Apple Cider, to Urine, to banana peel and a lot more. Anyways, I said to myself I wont give up. So I looked again in the pharmacy and that's when I found WARTIE advanced (Wart and Verruca remover).
The instructions very easy. There are even videos online on how to use it. So I didn't get lost on what to do. However, I was still skeptical and I bought a separate Verruca removal plaster with Salicylic acid. So after I used WARTIE advanced, I still covered it with the Verruca removal plaster. It says on the Wartie instruction to wait for 14 days before using it again and can be used 3 times as long as you wait for 14 days to take effect before you use it again.
One week after I used it, the pain was gone. I can now walk properly. There's still discomfort because of the callus and all but it was a lot better. However, when it was nearing the 14th day, it started again. A little bit of pain and it looks like the wart is still coming back. So I said to myself, I will give it another dose. And so I did it, but this time I did not use the salicylic acid plaster. I just covered it with the corn relief pads and at times just cover it with band-aids. Then one week after my second dose, pain was gone and even the discomfort was gone. It was also looking better but still raw. Probably because of the band-aid. So I left it open now to dry. Peeled a bit of skin around. After the 14 days was complete, I can say it's healed. Thanks to Wartie.
NOTE: No one in my family got it even though we share bathroom. I've had for about 3-4 months. Also it was a bit nerve racking to use Wartie because I just relied on the instructions and haven't asked anyone who have tried it and what was their experience. I already had so much pain in my foot so I told myself, what could go wrong. I got scared obviously because I was anticipating that the freezing effect is going to be painful when you apply it but No. There's a little bit of strange feeling but not painful.
Please follow the instruction carefully on the leaflet.
1. First is to apply 1 drop of the conductive gel on the wart.
2. Put the can upright on the table or flat surface and remove cap.
3. Put the cap back aligning the arrow icon with the freeze icon on the can.
4. Press the cap firmly down for 3 seconds. (Do not exceed 3 seconds).
5. Take off the cap and precisely apply the frozen metal tip on the wart (if it is hand - 20 seconds), but in my case (it's on my foot - 40 seconds).
6. Apply protective paster that's included in the pack. (In my case, I applied Scholl Verruca removal system). But in the end, I just relied on the Wartie.
The story of my guitar Lyon by Washburn HSS strat type black. I can vividly remember almost all the details when I first bought this guitar. I went to Southampton with my other half to look for a guitar. We first went to The Guitar Store (Home of Tone) in Southampton. Went in and look around, during that time (about 7 years ago), staff wasn't too friendly. They look at you as either you want to buy or just messing about. They didn't entertain me and when I look for a staff to ask around, I didn't get much help either because it was like what he wanted was I need to know what I want to buy and just get it and pay. No help whatsoever so I went out and went to the next shop which is Becketts Music Ltd. The moment I went in, the guy was so friendly, smiling and help me all throughout. He first ask what Im looking for and I said, Im interested in buying a guitar. So he asked me what sort of guitar. And I said electric guitar. Also I asked if I can pay using credit card and he said "absolutely yes." He asked me what sort of budget do I have in mind. And I said, Im on a really tight budget and it was between £150 to £200. So, he said I can give you a package where an amp and gigbag is included. He pointed out which guitar I can try. I've tried a couple of guitars, one was Fender strat copy and the colour was mint green, very nice but the tone, action and feel of it was far for my liking. Then, I tried this Lyon by Washburn, which got a nice look, lovely tone but again it didn't feel like that's the guitar I wanted to get stuck with. But I know for a fact that it's within my budget and will do the job.
So, in short I bought that guitar, and it came with a Stagg 10-watt practise amp, gigbag, strap, lead, allen screw and a tremolo bar. Oh, by the way, I bought the guitar because, I met a guy named Mike and he invited me to join his band. So, I needed gear to use for rehearsals and potential gigs.
Came home, really pleased and was over the moon. I don't drive so we used the train back to Romsey. Unpacked my guitar and amp, plugged everything in. Enjoyed it. Action was really high and the bridge of the guitar was a bit pointy, I can't explain but I mean the screws on the saddles were sticking out and it's hitting the heel of my hand. But, eventually I got used to it. Also I told myself I needed to buy an effects pedal. Originally, I wanted to buy individual stompbox even just one distortion pedal and that would do me. But, when I looked at the prices, it was a bit too much for me. That's when I found Digitech RP55 multi effects processor which is the cheapest effects pedal that time. Bought it only, through Amazon. I think it was around £35 to £40 that time. And that completed my gear.
I've rehearsed, did online videos, gigged and even recorded using this gear. From Romsey all the way up to Norwich. Did a support act in Colchester for a famous local artist from the Philippines named Bamboo. I joined the band from Norwich which is Crossedwind. We then had loads of gigs after that and able to record at Ashwood Recording Studio. Also, mostly, we rehearsed at Earth Studio.
Eventually, I learned a little bit on how to setup my guitar. I mostly look online especially YouTube. So, I adjust the action and intonate the guitar. Still I was not very satisfied. I also improvised and made a DIY pedalboard using my Digitech RP55 with an M-Audio universal expression pedal. Then, I started to look around for different amps, different pedals and even looking for a new guitar.
I sold my Stagg 10-watt practise amp and bought loads of different amps from an old Ashton solid state combo 30-watt amp to a tiny BB Blaster 15-watt practise amp. But I always love the tone Im getting from Panther by Hohner TEGA-10 that I always borrow from Mike during rehearsals and gigs. I never get the chance to buy one that time. Also I got stuck with Roland Cube Street. I love the tone of that amp plus it's portable and can be operated using batteries. However, when I joined Subtle Culprits, I was surprised that this amp can't stand out with the other guitar and the drums. That's when I decided to sell it and bought the Roland cube monitor CM30 but still couldn't managed the volume during rehearsals. Then I bought Belcat V35RG, it was a lovely amp and gigged with it for a couple of times and decided again to sell it. Until I found a cheap Hohner Panther TEGA-10 online. Used it a lot until I burnt the speaker. So I changed the speaker with Celestion eight 15 and up to now I still got it.
About the pedal, I sold my Digitech RP55 and bought online Boss ME-33, I love it because I got everything I needed but it was a bit big and the sound that I wanted during live gigs wasn't there. I find that during live gigs my Digitech RP55 was a lot better. So, I decided to sell my Boss ME-33 and changed it to Korg AX100G. Again, this was a lovely effects pedal. Very portable and lightweight. Battery operated. Lots of nice settings, but it got me confused if it was my guitar that's need changing or my amp. And that's when I found Zoom G1xOn, which up to now Im still using.
I bought a different guitar this time, it's Silvertone SG copy. I had lots of problems with this guitar but managed to sort it. This time, I left my Lyon by Washburn in Norwich and told them Im selling it. I posted it on Gumtree as well as eBay. I even wanted to just give it away because I was really not happy with that guitar in terms of playability. But, no one wants to buy it. Until I got it back again when my new band Subtle Culprits had a gig in Norwich Bario Fiesta.
Then, the upgrade started. I bought new Stainless Steel Saddle Set - 52.5mm Spacing Guitar Bridge through eBay and this changes the feel of the guitar as well as sustain. It is much smoother now to put the heel of my hand on the bridge. Then, I decided to change pickups. I only changed the neck and the bridge. I bought Wilkinson Vintage 60s for the neck and Wilkinson Hot Humbucker MWHB for the bridge. I installed it myself. Again it changed my guitar. And the last upgrade that I did was when my friend Dave from work, offered to spray paint my guitar. And that's it, the looks was changed. But overall it's the same guitar I bought from 7 years ago.
I bought a cheap multi-effects pedal but very versatile and tons of good tones on presets available for use. However, there's no expression pedal for WahWah and the auto wah option that came with the preset is good but not satisfying. So I did a bit of hack on my Digitech RP55. And with that I converted it to a Whammy pedal and Wah pedal. All I did was bought from eBay a generic expression pedal. It was an M-Audio keyboard universal expression pedal. It's also cheap so I thought to myself, what can go wrong. I can always open it up and change circuitry inside. So I plug it in, then turn on the wah option and when I tried it, it was the wrong way around. I think the polarity of the keyboard expression pedal is different from a wah pedal.
Sol I tried reversing the polarity by inverting the jack’s wire. But nothing happened, it was still the same. Then, I moved to rotor inside and reversed the polarity. Although there were three wires, I was lucky and managed to reverse the polarity. My pedal now is working properly as a wah pedal. I even tried it on the whammy patch and it did work as well.
What I did next was improvising on making it a proper mini pedalboard. First I look for a flat wood or something that I can put my Digitech RP55 as well as the expression pedal next to each other. I found our old wooden square placemats. Then, tried putting the effects pedal and expression pedal together and it was perfect fit. Next, I bought some arts and crafts materials like glue and coloured foam sheets. Glued one on top and one at the bottom to prevent the wood from slipping or sliding. It served as a cushion. Then, I created a bit of designs like stars, etc. I also bought velcro so that I can remove my effects pedal if need be and stick it back to my improvised pedalboard again. So I glued one part of the velcro on the effects pedal and expression pedal, then the other part was on the pedalboard itself. Perfect fit and very handy.
The quest for tone is endless. Like what amp to use, what pedal to buy, what type and/or brand of guitar, what brand and/or gauge of strings, what pick, what lead or cable to use, etc. etc. etc. The simple answer to it is.... You are the tone. It starts in your brain as a concept or idea then it translates to your ear as an aural perception. Then that's the time you buy stuff and try to tweak, adjust, setup to your liking. Your fingers are the accessories because there are people that use their toes to play guitar or some appendages to strum or pluck the strings for example Tony Iommi got prosthetic fingertips. But, it didn't stop him from playing the guitar or hindered the tone that he wants for his guitar. Right, having said that, let's crack on and get your gear out, whatever it is.
Plug your guitar to your amp and start tweaking your amp. Normally, amp got Master Volume, Equalisation either Treble, Mid and Bass or just Treble and Bass and at times just one Tone control. Then some amps got a Gain and a separate Volume control for that gain. Other times, amp got channel control or switch for Clean and Crunch or Overdrive.
Master Volume: This determine the loudness of the amp so it depends on the room size your playing or the person your jamming with. So adjust accordingly. Start at low level especially when your practising on your own. When you want to get a decent Clean Tone, put your volume between 4-5 or 10 to 12 o'clock. If you want a bit of dirt/overdrive, lower your Master volume to 1-2 and increase your gain and volume.
Gain control: Some amps as I've said earlier got 1 gain and 1 separate volume control. Others got two gain controls like this practise amp Park G10. But I guess, Gain 1 is your volume and Gain 2 is your overdrive or actual gain. I suggest you turn gain 1 up to 1/4 or about 3 and gain 2 on 0. Just to get the right volume for the amp. Then, try to fiddle with gain 2 and decide on how crunchy or dirty you want your amp. If you are a blues fan, perhaps put gain 2 on 1/4 to 1/2 (between 9 to 12 o'clock) and if you are more of a heavy rock or metal fan then turn your gain 2 to 3/4 or full blast.
Equalisation: This is where the fun begins when you are looking for tones. The most common EQ setting is putting the treble, mid and bass on 12 o'clock. Then, from there, start turning the bass up to 3/4 or 3 o'clock and then try it full, and see how the amp as well as the speaker handles it. Next, try and turn treble starting from 0 all the way to full blast. Listen and find out which one you like it the most. Then, same goes with your mid, try to turn it down to 0 and work your way up to 1 o'clock. I never put mid full blast but I suppose if you put bass and treble full blast then surely you can with the mid but then again it will just be the same as putting it all on 12 o'clock.
Your Guitar: There are a lot of factors on your guitar, like the pickups, the height of the pickups. Also the strings albeit the type of strings ang/or gauge. The neck length or the scale length. The type of wood from body to fretboard. If it is solid, semi-hollow or hollow guitar. And a lot more. But, will talk about the obvious like the volume control, the tone knobs and the toggle switch for the pickups. Start on which pickup you like the most, i.e. neck or bridge, both or just the middle pickup. Then dial the tone knob of your guitar from 0-10. Find which tone you like the most. Also volume knob plays a great role especially if your amp is a tube amp. You can push your amp's gain and then lower your volume from your guitar. There are tons of techniques and information to learn and know. Keep trying, keep experimenting. Good luck!
One Master volume, Three band EQ (treble, mid, bass), Overdrive and a separate Volume. One input, Headphones out, a Line Out and Footswitch input. Speaker changed to a Celestion Eight 15 at 8 Ohms. Just a bit confusing on what is the exact wattage of this amp because it's called TEGA-10 and then at the back there's this 40W and the original speaker was 20 watt at 4 Ohms. So I don't know exactly what is the wattage of this amp.
As for the sound of this amp, it's not loud as in piercing loud but surprisingly enough, it can cut through a loud drummer and a really loud guitarist. Although the sound is a bit too dry and tight and obviously with the 8-inch speaker there's no low end to this amp it more of treble that you will hear.
About the overdrive, I haven't tried the footswitch jack input at the back as I don't have any footswitch pedal. But by turning the overdrive knob all the way up and the volume knob half way or even all the way up as well whilst putting the master volume to a minimum between 1-2, you can achieve that distorted sound. I think this amp is more of a clean tone amp, very nice for ska or reggae.
It is small and portable but I wouldn't say it is lightweight. I mean, when you pick it up, it's sort of manageable but if you carry this for few minutes, you can feel its weight. I have gigged with this amp but it was mic'd in and gigged this on its own without mic, and it managed to cut through. I think this amp is a very nice amp and can stand the test of time. I tried selling it, but I decided to keep it for a bit.
Park Designed by Marshall Amplification PLC. 15 Watt RMS at 8 Ohm. One channel. Two gain control. Three band EQ (treble, middle, bass). One Master Volume. Headphones out. No Line Out or Footswitch output. No effects. No reverb. Straight forward practise amp. One input for your guitar. Opened back, good for putting leads plus lightweight to carry.
Tone is really nice because it sounds like tube amp. And then even though there's no reverb or effects, it still produces a very nice clean sound. I don't know how they do it. It doesnt sound dry at all. And when you push it like putting everything all the way up especially the two gains and just limit the master volume to 2 or 3, the distortion that's coming out is really nice and it sustain nicely.
I can't say much about this amp because I haven't tried it yet gigging or even use it during rehearsals, but judging from this video recording, I think this amp has got a lot to offer.
If I were to recommend, I would buy and use this amp mainly for recording and/or rehearsals. I cant imagine this amp during gigs yet but who knows, it might be a good amp to gig with.
Bought this with a lot of stuff before like Mic stands, mic holder, and SubZero 300W portable PA system. I haven't use this microphone as much as I could because it won't fit on the mic holder that I bought with it. And then, I got my old wired microphone that's handy because I don't have to setup, plug to a power outlet and put battery on. So, recently I got the chance to open it again and really look into it. This is what's included in the box and how to setup this Dual Wireless Microphone System.
I just recently found out that you can use this wireless system with only one lead. When I opened this unit before, I was surprised that it has only one mic cable so I looked for another cable that I bought from Maplin and used it. But to my surprise, when I browse the manual, you can use the unit with just one lead. And it worked.
Another thing that's new to me, was that, when I used this before with the PA system that I bought with it, the Subzero 300w portable PA system, it seems like the two mics tend to absorb the signal. Mind you, I plugged a guitar and mp3 player to that PA system plus these wireless microphones so probably that one of the causes. But when I did this review using my NI Guitar Rig Session IO USB interface, it seems to work fine.
Overall, the sound quality that this mic produces, is decent. It may vary on what amp or PA system you are using but the mic itself is very good. There a nice balance between treble and bass. When I did this review, I don't have EQ (treble, mid and bass) to mix or adjust and also I don't have effects like reverb or echo. So it really plain, straight-forward mic to a recording device.
Juice Power Station extra high capacity portable battery power. We bought this two days before Camp Bestival. It's because we desperately needed it for our camping. We didn't know exactly how this thing works apart from what's written on the manual. We were a bit disappointed on our first few usage of this device. But eventually we got the hang of it.
We also brought this home during our recent trip to the Philippines and that's how we discovered a lot of things about this portable power bank. In order for you to check the battery levels, you need to connect your phone first and shake the device. That way it will wake up your power bank from standby mode. It's very handy because of it's size and weight. Overall rating is 8/10.
Specifications:
Power capacity 11200 mAh.
Outputs: Two ports (2.4A rapid charging and 1A normal charging)
Charging time: 6-7 hours
Can charge two devices simultaneously.
Comes with a bag/pouch and a micro USB lead.
It was already August in the Philippines but it was still hot as in very muggy. So, we decided to look for a place to swim -- to cool down. My mum and auntie recommended Islands Hotel because it is near and because it's a hotel then probably it's not under the sun.
Off we went to Pueblo de Panay. The swimming is separate from the hotel but you will have to book from the hotel reception. It's not a big swimming pool but it's nice. Kids enjoyed it. Also you can get a package where you pay 500 pesos something (I forgot the exact figure) and you get a pizza, iced tea and 3 kids and two adults. Swimming and food included. Isn't it a great value for money? There's a function hall as well for hire for birthdays and other events.
Also we decided to dine in the evening. They got a nice lounge. On the ground floor, they got a grand piano near the reception, mini stage and there were two guys performing using backing track. They were singing combination of pop and folk songs. It was a bit loud for us so they recommended for us to go upstairs in their quiet lounge and we love it. It's a lot better, we can chat and have some photos, selfies and groupies.
Please if you have enquiries, you can contact them directly at Islands Hotel facebook.
Next, we went to Espacio Verde. This one is a lot better and bigger with slide and lots of changing rooms and shower rooms. They got hotel as well or rooms to stay. Bigger place to eat. We enjoyed the swimming and forgot to ask if they got sort of package where you can book a group or family and have meals included. But anyways, we went there to swim and we really enjoyed it. Also it wast late in the afternoon, almost evening when we went. So, there's no more sun and we enjoyed the lights in the pool.
If you got questions about Espacio Verde, please contact them directly on their facebook account.
It was quite a journey from Iligan to Cagayan and eventually to Del Carmen in Lagonglong, Misamis Oriental. First, before we left Iligan, we stopped at a pharmacy to buy anti-sickness meds and dioralyte because our niece was not feeling too well. Even myself got a bit of a funny tummy, so I had to take loperamide. I think it was because of stress plus a bit of alcohol the night before when we jammed in a pub.
There was a bit of a scary moment that happened on our way to Cagayan. It was because we were in a hurry, we missed the checkpoint. We thought that it was all right to go past them but we were wrong and an army guy was waving at us to stop but it was too late so we sort past them few feet away and he had to really stop us. He asked for car registration, insurance, our IDs, driver's license, etc. And he said, that we should drive slowly when approaching checkpoints to avoid delays like this. The army guy although strict was calm headed and sensible. He let us go after few questions of where we're from and where we're heading.
The places I can remember going to Cagayan de Oro up to Del Carmen Resort were Lugait, Manticao, Initao, Laguindingan, El Salvador, Cagayan City (we passed Centrio Mall), Tagoloan, Steel Asia, Villanueva, Coca Cola Plant, Jasaan, Pilipinas Kao Inc., Kahulugan and Twin Hearts resort, Basamanggas resort, Liyang Beach resort, Binitinan, Baliwagan, Balingasag, Napaliran.... and we even past Del Carmen Resort because there's lots of road widening and other road works. We missed the signage because it was out of the way. Good thing there's always lots of good people around to ask. And they direct us to go back few blocks away and there's a tiny crossing or junction which you wont even notice and that's the way to Del Carmen Resort.
As evidenced on the video, we had a nice time at Del Carmen. Stayed there overnight. The staff were great. They are very helpful. The place was very clean. Toilets are clean. The pool was a free-flowing deep well. So it was something different and more natural than the chlorinated ones. Pricewise, it was affordable. Especially the rides i.e. banana ride, aqua bike and the aqua park. Jetski's not for rent anymore during that time. Flyboard and Kayak were not available too that time. The only downside that I can think of was the communication. For example we ordered food, they didnt mention that we need to pay a deposit if we are going to eat in our cottage for the cutleries, plates and bowls. So they just delivered the food with nothing. Also like the coffee, they said that it was 8 pesos but if you're going to just get hotwater it's 5 pesos. They didnt mention as well that you will have to pay for the cups. Good thing we have our own disposable cups. They ask for deposits on most of the stuff like the water gallon. But overall, they are great. Like when we booked the Aqua Park and we paid for 6 persons, I had a terrible leg cramps. It was because of tiredness, probably dehydration and we just finished the superfast and fun banana boat ride. The guy even offered if we want to be tipped over in the middle of the sea because that's part of the fun hehehe, but we only agreed to be tipped over near the seashore. Hahaha. It was really a good fun. The aqua bike was very calming but at the same time tiring on the legs.
Back to Iligan: We stopped over Jollibee again. Ate and relax a bit then travel back to Iligan. Back in Iligan, we went to the cemetery, paid respect to our Lolo, Lola and Auntie. I forgot to mention that my boy was not well after our escapade at Del Carmen. Probably he drank water from the pool or from the beach. He was sick and having loose bowels. Good thing the entire time during our trip, he was fine. But when we finally reach Iligan, he was knackered. We went to Robinson's place again. They did shopping and groceries. Me and my boy were in foodcourt. I tried to buy him soup or something but he just doesnt appetite. He fell asleep on my lap. There was a band that time in Robinson's but we didn't manage to watch. We were just stuck near the foodcourt because the chairs and tables are reserved for the customers and me and my boy didnt buy anything, so I was too shy to sit there. Good thing there are waiting areas around. We got the chance to sit and he had a nice nap there.