google.com, pub-1966210621826395, DIRECT, f08c47fec0942fa0

How to use iTrack Pocket


What you need to know about iTrack Pocket


iTrack Pocket is designed for YouTuber either your a presenter, a musician, a singer or someone who needed a decent audio quality for video recording that's done simultaneously. Like when I do most of my video recording, the audio is recorded separately. For example Im using Quicktime player for the video and Garageband for the audio, then put or mix it together using iMovie. The challenge is to make sure that the audio goes with the video and there's no noticeable delay. So the perfect solution for this is the iTrack Pocket. It so so portable that you can record anywhere, anytime.


Here are the list of questions to ask if you want iTrack Pocket:
1. Are you a singer who wants to record yourself or your ideas instantly and with decent audio/video quality?
2. Are you a musician who wants to record your instrument, your performance, your ideas?
3. Are you an iPhone user or planning to buy one? Because this gadget uses IOS platform. You will be needing either iPhones or iPad.
4. Do you want an easy setup, portable, and can be used almost anywhere?
5. Are you a vlogger, YouTuber, presenter?
6. Do you want a recording studio that fits in your pocket as well as your budget?

If you have two or more yeses to these questions, then iTrack Pocket is for you.

This mini gadget is an all-in-one solution that will do all the trick and save you time and money. No need to buy expensive condenser microphone, mic stand, camera, tripod for your camera, audio interface, recording software and loads of time and effort in editing. iTrack Pocket  is literally a studio in your pocket.

Where to buy? Loads to choose from online. I bought mine from Gear4Music and it was Black Friday that time so I got a good deal. It was only £14.99 plus £3.49 delivery.

What's included in the box? Just the iTrack Pocket itself, the lightning cable and the manual. The box itself contains the instruction on how to install, register, etc. So don't lose the box, you need it for the bundle code and serial number.


Is it easy to install or use? Well for me it was a bit tricky, because Im not an iPhone user. Im lucky because not only my other half bought me an iPhone for xmas, she's been using iPhone ever since so I got a private tutor on how to use iPhone. iTrack is sort of plug n play. It doesn't come with a CD or installer. All you have to do is download Impact by Focusrite from App Store and plug your iTrack using the lightning cable then connect it to your phone and open the app after you downloaded and install it. Don't forget to register your iTrack. Instructions are found on the box as well as your registration code, etc. You are all set. Just hit record.
              

What iPhone is it compatible? iPhone 5, 5S, 5C. Apple devices using iOS 6 or 7.


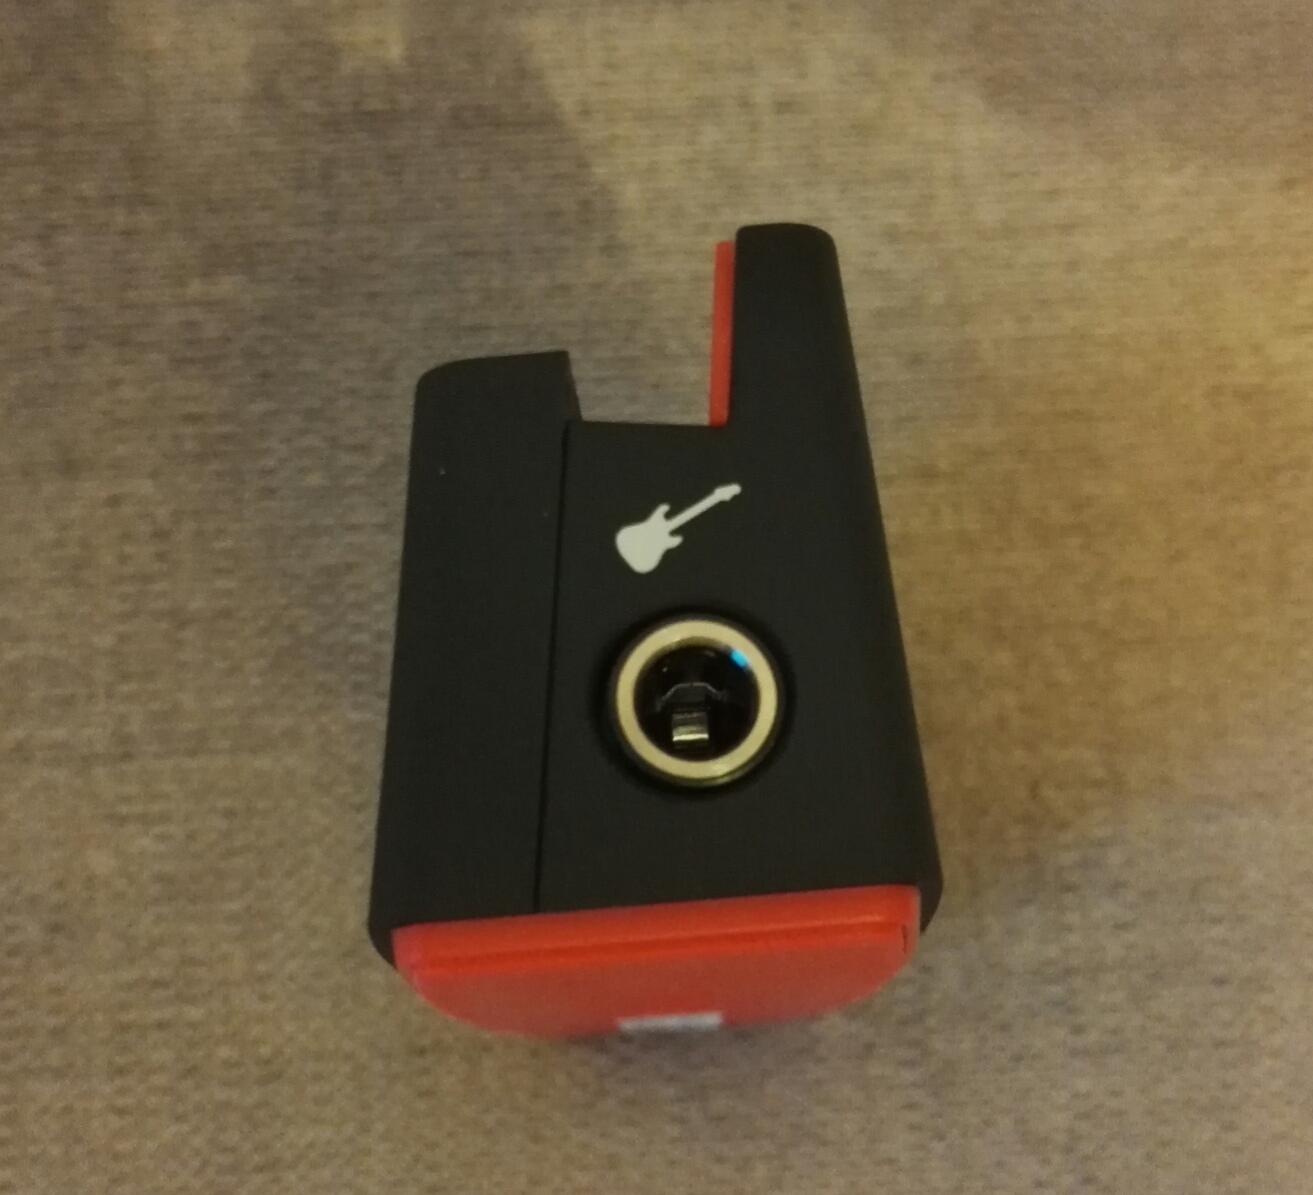
How to record instrument? You can either record using the built-in stereo mics or plug your instrument (guitar, bass, keyboards) using the 1/4" input. Then adjust the volume knob on the side. Make sure it doesn't clip. Then, you're ready to record.


How to add effects? You have the option to add effects either before recording or after you record your video. Just simply click/press the FX icon and swipe to choose what amp/effects to use.


How to edit/cut video? There's a strange looking icon on the bottom next to the FX icon, click that and then a film strip will appear on top of the screen. You can drag either ends to edit the length of your video.


How to delete or discard recording? I really struggled at first to remove or delete the test recordings that I did. It was because, I couldn't find the delete button. Being new to iPhone didn't help as well. Or perhaps, it was my eyesight. But eventually I found the icon. First, you need to go to file/recording library or folder. Then on the top right corner, you can see a word SELECT, press that one and then select a video or videos you want to remove. After you select or click the video/videos you want to delete, the margin or borders will become highlighted. Then at the right bottom corner or your phone, you will see the bin icon. Press it to delete.


How to upload recording? The upload icon is located on top, click it and select where you want to save or upload the video.

Southampton Ice Skate experience

Ice Skating Fun in West Quay


After going to church this Sunday, our family went to Southampton to have fun and guess what we did, Ice Skating. Mind you, we don't know how to skate how much more skating on ice. We grew up in a country where there's no snow and definitely no ice skating rink. But, no matter what the odds, we still went ahead.

First obstacle was getting a ticket, the day before we already went and check. But, we did not manage to get a slot because it was sold out that day. So, what we did was book online. Again, even booking online was difficult. Seems like everyone wants to go skating. We got the 2:30 PM session. No penguins available when we booked online.

Now going to Southampton was traffic that day and it was really horrendous. We opted to park in IKEA because it seems like everyone was parking in West Quay. But, even there, it was jam pack too. Straight away, we went to the ticket booth and showed our booking confirmation online. It was straight-forward. They will just give you token and direct you where to go or what to do. We enquired if there were penguins available and the lady at the ticket booth said there were two available. So we took those.

Went inside and there are bench and lockers plus loads of friendly staff to assist us. Again straightforward, shoes off and hand it to the staff and asking what for your shoe size. Then, they will give you your ice skates. You can ask for helmet and wrist support/guard, and it's free. We noticed that all the staff are jolly and you know that they really love what they're doing.

We waited for about 5 mins or so because they were cleaning the skating rink and making sure that it's good to go. Then, queue started to buildup and the excitement as well from the room was just going higher and higher. And, when they announced that the skating rink was open, every was just too keen to go.

Coming in was really difficult because apart from lots of people on queue and getting penguins, the ice was really slippery. After we got our penguins, we were just moving slowly and holding on the sides. We managed to go around counter-clockwise, following everyone. There were lots of people who fell and bump their bums on the ice but staff were there ready to help and also most of the people were helpful to assist each other. It was generally fun. Just be mindful because there were loads of people and kids, so you don't cause accident or if you are looking after a couple of kids or more, keep an eye always because there are really loads of people. The music was also added attraction. It makes it more energised and fun to skate.


I thought that we were only gonna go for one round and that's it but we managed to go about 4 or 5 rounds. It was tiring though because most of the time, I was holding on the rails and looking after my little boy. So, after the session was finished, we headed back and return the penguins and the skates. We were really exhausted and hungry. But that's not a problem because there are lots of restaurant/fastfood nearby. We went to Five Guys. There was a queue but it was not that bad. The peanuts there was free and it taste nice, just be careful and mindful of allergies. The serving was big. Because we ordered little burger and I don't think it was little. The chips was also delicious. Hotdog was lovely as well and tons of choices for your drink. Also it's drink all you can.

That completed our Ice Skating experience.


Review of Phillips Series 3000 Shaver

Phillips Series 3000 QG3332/23


This is a 4-in-1 men's grooming kit (beard, stubble trimmer, hair clipper). Waterproof, can be washed directly under the tap but make sure that the charger wires are not hooked.  Skin-friendly, high-performance blades for a gentle trim. Really soft and smooth to the skin. Up to 60 minutes use on a 10-hour charging. Really good wireless shaver.

Q7 Wireless Handheld KTV Karaoke Bluetooth Microphone Mic Speaker For Phone UK Review

Q7 Wireless Microphone and Hi-Fi Speakers


We love singing, and our family bonding would always be KARAOKE. Such a shame our next door neighbour is not a big fan of it and will bang our walls each time.  We can't do it even if it's only 3 in the afternoon or even on Christmas eve. Party will never be complete for Filipinos when there's no Karaoke or Videoke. Good thing I found this Q7 Wireless Handheld KTV karaoke bluetooth microphone when we went home in the Philippines. Saw it in the mall.  Actually, one of our friend already mentioned it to us that there's this bluetooth microphone that they are using and their neighbour now is not complaining because of this bluetooth mic. So, I looked online and bought one for my wifey through eBay. It's quite cheap but it did arrive and delivered on time and complete.


Unboxing: It came with a softcase. It was not as secured as I would expect. But I guess you get what you pay for. The unit is fine and it came with two leads. One USB lead for charging and the other one is the earphone lead for your phone so you can connect the microphone and sing and record using your Android or iPhone. You can operate this microphone even without reading the manual. But it's good to browse the manual so you got a better idea of what you can do about this microphone.


It is rechargeable, so when it came I had to recharge it first before I can use it. Also at the bottom of the microphone there's a USB input. I used my USB flash drive which has almost 1000 mp3 songs and it converted the microphone into a Hi-Fi speaker system. It is much louder than using the microphone speaker as your karaoke monitor. The USB option for flashdrive is amazing. I love it. The sound quality is a lot better than when you are singing through this mic.


The only downside that I can think of is that.... they could have put an earphones out. So you can connect your headset to it as your monitor. That way your speaker system can be private at times and also when you're singing, you can connect it to a portable recording device because it has an earphone line out.


Wireless Headphone 5-in-1 Hi-Fi S-XBS MH2001 Review


Cheap Wireless RF Headphones


I was looking for a headset that is cordless but not bluetooth connectivity because I will be using it for my guitar effects pedal or when Im doing home recording using my Native Instrument Guitar Rig Session IO. That's when I found this Hi-Fi S-XBS MH2001 5-IN-1 Wireless Headphones on eBay and it's quite cheap. So, I said to myself, I will have a go and buy one. Anyways, it's cheap what can go wrong.

Parcel Arrived: Well packed and it's not bad. I mean cheap but decent. I then tried it, followed the instructions on the manual which is quite easy and straightforward. They call it RECEIVER and EMITTER. Before, we use to call it Receiver and Transmitter isn't it?

The box contains the Receiver and the Emitter, one mono 3.5mm short earphone lead and manual. The Emitter already got the necessary lead connected to it. Also there's option to use 4.5v adaptor or batteries which doesn't come with the unit when you purchase. Good thing I always got batteries. The Receiver needed two AAA as well as the Emitter also needed two AAA batteries.


It is quite easy to use. Just follow the polarity of the batteries when you install it to the Receiver and Emitter. Only problem was when I was opening the battery compartment of the headphones, it's a bit hard because firstly, locating it. Although it was illustrated on the manual but sometimes we are not sure or what we don't care to read what's on the manual.

The battery compartment is located on the Left side opposite to where the volume and on/off control, reset and scan buttons. Slide to open the battery compartment. Once batteries are installed, turn volume control up to turn the unit on. Press reset and then press scan to use the FM function of the the headset. I enjoyed the FM functionality of this headset.

By the way, the headset is lightweight and comfortable. Fully adjustable, it even fit my 7-year-old boy. The materials are cheap but acceptable, I can't complain because the price is quite cheap. Sound is decent, got low bass sound as well as high trebles. However, when I tested the wireless functionality, it was not as loud as the FM volume. And, to pair your headphones to the Emitter, you have to press RESET first and then SCAN. Otherwise, it will still function as FM headphones.

I haven't tried the WIRELESS NET AUDIO CHAT and WIRELESS MONITORING because these weren't the reason why I bought this unit. I've tried the Wired headphones and I liked it. It's much louder and clearer compared to being wireless. I didn't like the lead that came with it because apart from it's short, the quality is cheap. So, I decided to order on eBay a longer and much better quality lead.

So far, I am quite please with this unit and will be using this most of the time; around the house whilst washing the dishes, ironing clothes, before going to sleep and of course jamming with my guitar and doing some home recordings. This time there will be no annoying cord/lead hanging in the way when I play my guitar. 

Best Plantar wart or Verruca UK over-the-counter treatment

My Plantar Wart Ordeal


It started as a callus on the ball of my left foot. I thought at first it was due to my very old shoes and the sole of the shoes that's wearing thin. It felt like I was stepping on a nail or something sharp that's poking my foot. It was like that for a while and then later on, it's getting worse in terms of discomfort. So I had to investigate and check what's happening in my foot. It looks like it was forming into a corn. I didn't know about this stuff, I just looked on Google and searched for symptoms that I was feeling at the time. I didn't take photos of my foot, but the ones on the net looked similar on what's happening on my foot.

Remedy:  I didn't seek any medical advice. Just looked online and also went to pharmacy and looked around. I bought corn removal plasters. Used it for about a week and it relieved some of the discomfort and I thought it was helping. Then I started using file and just keep removing the callus around. Unfortunately, after a while, it came back again and the discomfort was getting worse.

To cut the story short, I didn't seek medical advice and just keep researching online and doing a lot of home remedies. Any thing that I can put into it, I would use. Even pain relief gel. Worse thing that happened apart from it was not healing and I keep doing something to it like I opened it using nail clipper because I thought there's just a splinter inside or trapped blood or something. So, that made it worse. And the pain was getting intense.


Another remedy: Corn removal (all-in-one pen). This one again, set my hopes high. I thought it was helping and I thought it will heal my corn. But, it didnt. It only scratched the surface. Again back to the usual habit of nail clipper and rubbing it off using file.


Then we went on holiday and the pain this time was unbearable. I think I got a very strong pain tolerance or I just don't want people especially my family to know how I suffer. But, they can notice that Im already limping. Then we went swimming in the beach. I thought that the salt water will help. But, what happened was, I stepped on a sharp rock or something that it bled. That's it, made it really worst. It was then that I looked closely and researched more online about it. And that's when I came across the word Verruca or Plantar wart. The pain Im experiencing, the look now on my foot. The white round thing and the tiny black dots. I can now confirm it was Verruca.

Treatment: After my own diagnosis, I now researched for treatment. There are a lot of treatments online and home remedies from Apple Cider, to Urine, to banana peel and a lot more. Anyways, I said to myself I wont give up. So I looked again in the pharmacy and that's when I found WARTIE advanced (Wart and Verruca remover).


The instructions very easy. There are even videos online on how to use it. So I didn't get lost on what to do. However, I was still skeptical and I bought a separate Verruca removal plaster with Salicylic acid. So after I used WARTIE advanced, I still covered it with the Verruca removal plaster. It says on the Wartie instruction to wait for 14 days before using it again and can be used 3 times as long as you wait for 14 days to take effect before you use it again.


One week after I used it, the pain was gone. I can now walk properly. There's still discomfort because of the callus and all but it was a lot better. However, when it was nearing the 14th day, it started again. A little bit of pain and it looks like the wart is still coming back. So I said to myself, I will give it another dose. And so I did it, but this time I did not use the salicylic acid plaster. I just covered it with the corn relief pads and at times just cover it with band-aids. Then one week after my second dose, pain was gone and even the discomfort was gone. It was also looking better but still raw. Probably because of the band-aid. So I left it open now to dry. Peeled a bit of skin around. After the 14 days was complete, I can say it's healed. Thanks to Wartie.


NOTE: No one in my family got it even though we share bathroom. I've had for about 3-4 months. Also it was a bit nerve racking to use Wartie because I just relied on the instructions and haven't asked anyone who have tried it and what was their experience. I already had so much pain in my foot so I told myself, what could go wrong. I got scared obviously because I was anticipating that the freezing effect is going to be painful when you apply it but No. There's a little bit of strange feeling but not painful.

Please follow the instruction carefully on the leaflet.
1. First is to apply 1 drop of the conductive gel on the wart.
2. Put the can upright on the table or flat surface and remove cap.
3. Put the cap back aligning the arrow icon with the freeze icon on the can.
4. Press the cap firmly down for 3 seconds. (Do not exceed 3 seconds).
5. Take off the cap and precisely apply the frozen metal tip on the wart (if it is hand - 20 seconds), but in my case (it's on my foot - 40 seconds).
6. Apply protective paster that's included in the pack. (In my case, I applied Scholl Verruca removal system). But in the end, I just relied on the Wartie.


How does Lyon By Washburn HSS sound

One Man, One Guitar, Lots of Tones


The story of my guitar Lyon by Washburn HSS strat type black. I can vividly remember almost all the details when I first bought this guitar. I went to Southampton with my other half to look for a guitar. We first went to The Guitar Store (Home of Tone) in Southampton. Went in and look around, during that time (about 7 years ago), staff wasn't too friendly. They look at you as either you want to buy or just messing about. They didn't entertain me and when I look for a staff to ask around, I didn't get much help either because it was like what he wanted was I need to know what I want to buy and just get it and pay. No help whatsoever so I went out and went to the next shop which is Becketts Music Ltd. The moment I went in, the guy was so friendly, smiling and help me all throughout. He first ask what Im looking for and I said, Im interested in buying a guitar. So he asked me what sort of guitar. And I said electric guitar. Also I asked if I can pay using credit card and he said "absolutely yes." He asked me what sort of budget do I have in mind. And I said, Im on a really tight budget and it was between £150 to £200. So, he said I can give you a package where an amp and gigbag is included. He pointed out which guitar I can try. I've tried a couple of guitars, one was Fender strat copy and the colour was mint green, very nice but the tone, action and feel of it was far for my liking. Then, I tried this Lyon by Washburn, which got a nice look, lovely tone but again it didn't feel like that's the guitar I wanted to get stuck with. But I know for a fact that it's within my budget and will do the job.

So, in short I bought that guitar, and it came with a Stagg 10-watt practise amp, gigbag, strap, lead, allen screw and a tremolo bar. Oh, by the way, I bought the guitar because, I met a guy named Mike and he invited me to join his band. So, I needed gear to use for rehearsals and potential gigs.

Came home, really pleased and was over the moon. I don't drive so we used the train back to Romsey. Unpacked my guitar and amp, plugged everything in. Enjoyed it. Action was really high and the bridge of the guitar was a bit pointy, I can't explain but I mean the screws on the saddles were sticking out and it's hitting the heel of my hand. But, eventually I got used to it. Also I told myself I needed to buy an effects pedal. Originally, I wanted to buy individual stompbox even just one distortion pedal and that would do me. But, when I looked at the prices, it was a bit too much for me. That's when I found Digitech RP55 multi effects processor which is the cheapest effects pedal that time. Bought it only, through Amazon. I think it was around £35 to £40 that time. And that completed my gear.

I've rehearsed, did online videos, gigged and even recorded using this gear. From Romsey all the way up to Norwich. Did a support act in Colchester for a famous local artist from the Philippines named Bamboo. I joined the band from Norwich which is Crossedwind. We then had loads of gigs after that and able to record at Ashwood Recording Studio. Also, mostly, we rehearsed at Earth Studio.

Eventually, I learned a little bit on how to setup my guitar. I mostly look online especially YouTube. So, I adjust the action and intonate the guitar. Still I was not very satisfied. I also improvised and made a DIY pedalboard using my Digitech RP55 with an M-Audio universal expression pedal. Then, I started to look around for different amps, different pedals and even looking for a new guitar.

I sold my Stagg 10-watt practise amp and bought loads of different amps from an old Ashton solid state combo 30-watt amp to a tiny BB Blaster 15-watt practise amp. But I always love the tone Im getting from Panther by Hohner TEGA-10 that I always borrow from Mike during rehearsals and gigs. I never get the chance to buy one that time. Also I got stuck with Roland Cube Street. I love the tone of that amp plus it's portable and can be operated using batteries. However, when I joined Subtle Culprits, I was surprised that this amp can't stand out with the other guitar and the drums. That's when I decided to sell it and bought the Roland cube monitor CM30 but still couldn't managed the volume during rehearsals. Then I bought Belcat V35RG, it was a lovely amp and gigged with it for a couple of times and decided again to sell it. Until I found a cheap Hohner Panther TEGA-10 online. Used it a lot until I burnt the speaker. So I changed the speaker with Celestion eight 15 and up to now I still got it.

About the pedal, I sold my Digitech RP55 and bought online Boss ME-33, I love it because I got everything I needed but it was a bit big and the sound that I wanted during live gigs wasn't there. I find that during live gigs my Digitech RP55 was a lot better. So, I decided to sell my Boss ME-33 and changed it to Korg AX100G. Again, this was a lovely effects pedal. Very portable and lightweight. Battery operated. Lots of nice settings, but it got me confused if it was my guitar that's need changing or my amp. And that's when I found Zoom G1xOn, which up to now Im still using.

I bought a different guitar this time, it's Silvertone SG copy. I had lots of problems with this guitar but managed to sort it. This time, I left my Lyon by Washburn in Norwich and told them Im selling it. I posted it on Gumtree as well as eBay. I even wanted to just give it away because I was really not happy with that guitar in terms of playability. But, no one wants to buy it. Until I got it back again when my new band Subtle Culprits had a gig in Norwich Bario Fiesta.

Then, the upgrade started. I bought new Stainless Steel Saddle Set - 52.5mm Spacing Guitar Bridge through eBay and this changes the feel of the guitar as well as sustain. It is much smoother now to put the heel of my hand on the bridge. Then, I decided to change pickups. I only changed the neck and the bridge. I bought Wilkinson Vintage 60s for the neck and Wilkinson Hot Humbucker MWHB for the bridge. I installed it myself. Again it changed my guitar. And the last upgrade that I did was when my friend Dave from work, offered to spray paint my guitar. And that's it, the looks was changed. But overall it's the same guitar I bought from 7 years ago.


ADDITIONAL LINKS OF THIS LYON BY WASHBURN HSS:

1. Original saddles and fixed bridge setup on Lyon by Washburn
2. Newly fitted Stainless Steel Saddles on Lyon by Washburn
3. New pickup and newly painted Lyon by Washburn